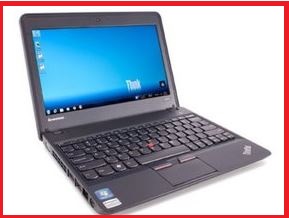
 Sometimes you experience an issue with your laptop and you don’t know what to do. Sometimes it’s a software issue, sometimes it’s hardware, and sometimes it’s a hardware or software issue that causes a glitch in the operating system. The good news is that Lenovo offers two safe modes for their laptops: Safe Mode and Recovery Mode. This article will show you how to boot your Lenovo laptop in these two modes, Lenovo laptop camera as well as explain how to fix some issues.
On your Lenovo laptop, you can boot it into Safe Mode or Recovery Mode. The difference between the two is that in Recovery Mode, you can perform a software or system update and the computer will be restored to its original factory settings.
Start your Lenovo Laptop in Safe mode Windows 10
In Safe Mode, it’s a lot less technical and allows you to do some troubleshooting on your own. Both modes are useful, but I prefer to use Recovery Mode because there’s no risk of damaging your computer. You can always use Compatible with Lenovo Laptop any other method listed below if using Recovery Mode makes you nervous about doing something wrong.
Note: All of these methods should work for most laptops with Windows 7/8/10 installed from a recent recovery disc but if your computer doesn’t respond to a command from the disc, you may need to use Windows 10’s Command Prompt as described below.
- Press the power button for about 30 seconds until the laptop turns on and then immediately press and hold down the “F2” key during boot up (see image above)
- When the Dell logo appears, release the “F2” key.
- At this point, you’ll see three options: BIOS, Advanced BIOS Features, and Boot Menu (as shown in images above). Use your arrow keys to highlight either “BIOS” or “Advanced BIOS features.”
- Press Enter to start your computer in System Restore mode
- Once you are in System Restore Mode, Engineering Students restore Windows 8/8.1/10 UEFI back to the most recent build (make sure you do not select any other option, as this is likely to cause problems).
- After Windows has installed and started up again, boot into Windows with the help of Step 1 above and complete the above steps from there. If you have a Dell inspiron:- Type “F12” when pressing power button- Press F2 for BIOS screen- Select Advanced BIOS Features or Boot Menu (see image above)- Use arrow keys to select System Restore – press enter- Follow instructions until you are back in Windows7.
Why is Lenovo Laptop not working right now?
Lenovo laptops are known for their reliability and performance. However, there can be instances where your laptop will not work right now. In this blog article, we will discuss the possible reasons why your Lenovo laptop is not working and how to boot it in safe mode to troubleshoot the issue. Lenovo-Laptop not working.
Note: Safe mode will only work if you have enabled Sales Reps the option from BIOS settings. For it to be active, select “Safe Boot” as the boot option and press F10 to set it up. In case your laptop does not have a Safe mode option on its BIOS, use “Power off” instead of “Safe Boot”.
The first thing you want to do is restart your computer in normal mode by pressing and holding the power button. From there, select restart and make sure that you see flashing or solid red light during the restart process. This means that you are already in safe mode. If you don’t get flashing or solid red light while restarting your computer , select the option to restart in safe mode from the windows boot menu. In case you don’t see this option, restart your computer and choose “Startup Settings” from the power options control panel.
There, you can enable safe mode by pressing F8 on a regular basis GIS Software until you get a prompt asking if you want to enable safe mode. If you can’t find such an option anywhere else, restart your computer and tap F8 multiple times until it appears. Now that you are in advanced boot menu, you need to do some additional things to get access to only the recovery tools and not the entire setup program. To check which version of Windows is installed on your system, press R and then R again on an empty space on the screen.
How to Boot Lenovo Laptop in Safe Mode
If your Lenovo laptop is not booting correctly, you may need to boot it in safe mode. Safe mode disables most of the software on your computer, which should help you diagnose and fix problems. Here’s how to boot your Lenovo laptop in safe mode:
- Power on your computer and wait until the Lenovo logo appears on the screen.
- Press and hold down the power button until the computer 64GB RAM goes into power off mode.
- Immediately press and hold down the Esc key while turning on the computer by pressing the power button again. (The first time you enter safe mode, it may take several tries to start up.)
- Once you see the desktop appear, release the Esc key and click on “Startup Settings” from the menu that pops up.
- Under “Boot Options,” select “Safe Mode with Networking” and then click on “OK”. (If your laptop doesn’t have a network adapter, you can try selecting “Safe Mode without Networking” instead.)
- While in safe mode, you may need to disable some software programs.
Disabling Protection or Restrictions on Lenovo Laptop
Lenovo laptops come with a variety of protection and restriction settings that can be disabled in order to improve performance. Disabling these settings can help resolve issues with slow performance or freezing, and can also improve security. In this article, we will show you how to boot your Lenovo laptop in safe mode to disable protection or restrictions.
To boot your Lenovo laptop in safe mode, power off Under 400 Dollars your device and then press and hold the power button until the laptop turns on. To access the boot menu, press the F2 key during startup. From the boot menu, choose “Safe Mode” and press enter. From here, you can disable any protection or restrictions that are preventing your device from operating properly. If the issue persists, try rebooting your device in normal mode and then follow the instructions below to enable or disable protection.
Step One: Power down the Lenovo laptop
- Step Two: Boot the laptop into Safe Mode by pressing F8 while the laptop is starting up.
- Step Three: Once in Safe Mode, open the Command Prompt (Windows Key + X) and type “bcdedit /set {default} bootstatus=enable” without the quotes.
- Step Four: Type “exit” to exit Safe Mode and return to regular mode.
- Congratulations! You have now successfully booted Lenovo Laptop in Safe Mode!
Step Two: Press and hold F2
If you are experiencing issues with your Lenovo laptop and you are not able to solve the problem using the troubleshooting steps that were mentioned earlier, it is time to boot your computer in safe mode. This will help you isolate the issue and fix it.
To boot your computer in safe mode, first press NVIDIA RTX 2070 and hold F keys at the same time until you see the Start Menu appear on your screen. Then, click on Boot Options and select Safe Mode.
Step Three: When the BIOS starts up, use arrow keys to navigate through the BIOS options
Li-ion battery should be charged if using a power adapter
Configure the BIOS to allow Windows 8 installation
When you finish the steps in this article, your Lenovo laptop will boot into Safe Mode. Here’s what you need to do:
- When the computer starts up, use the arrow keys to navigate to the “BIOS” option.
- Use the Enter key to start the BIOS.
- Scroll down to “Boot Options.” Under this menu, select “Safe Boot.”
- Under “Safe Boot Options,” make sure that “Windows 8 (64-bit)” is selected. This will allow you to install Windows 8 on your computer.
- Press Esc to exit the BIOS screen and restart your computer. After your computer restarts, you’ll be able to install Windows 8 on it.
Step Four: Select “Boot from floppy” and Press Enter
In order to boot your Lenovo laptop in safe mode, you will first need to access the BIOS. To do this, press the Delete key and hit F2. Next, use the arrow keys to select Boot from floppy and press Enter. Finally, boot your computer from the floppy disk.
When you get to the GRUB menu, select the “Floppy” option. Once the floppy is loaded, press enter to boot from it.
If you have a Windows installation on your laptop, you’ll need to boot into Safe Mode first. To do this, restart your computer and immediately hold down the Shift key while you power on the laptop. After a few seconds, release Budget Laptops the Shift key and continue holding down the Power button. At the Lenovo screen, release both keys and press F8 to start up your computer in Safe Mode.
In Safe Mode, Windows will not load until you click on its icon in the Taskbar. Click on it and then select “Safe Mode with Networking” from the menu that appears. When you do this, your computer will ask for your Administrator password. Type it in and then press Enter to begin loading Windows.
If you have any files or programs installed on your hard drive that are not compatible with Safe Mode or Windows 8, they will not be loaded during this process and you’ll need to remove them before proceeding. You can also use System Restore to restore your computer to an earlier point.
Step Five: In the boot options menu, select “Windows 7” from the list of operating systems
If your laptop won’t start, you can try to boot it in safe mode.
Safe mode will disable most of the programs on your computer, which should allow you to fix problems by starting from scratch. To boot your computer in safe mode, first go to the boot options menu and select “Windows.” Next, select “Safe Mode” from the list of operating systems. In safe mode, only the essential programs will be running. This will help you troubleshoot problems more easily.