How to Zoom Out on a Photo Already Taken Zooming out on photos is a simple yet effective way to add depth and perspective to your images. It allows you to capture more of the scene and give your Zoom App Laptop viewers a wider view of the surroundings.
Whether you are using a professional DSLR camera or just your smartphone, learning how to zoom out on photos can greatly enhance your photography skills.
10 Ways To Zoom Out On A Picture Already Taken
Photography allows us to capture and preserve our most cherished memories. From family vacations to special events, we rely on our cameras to freeze time and capture the beauty of life. However, even the most skilled How to zoom out on a picture already taken photographers can sometimes end up with photos that are too close-up for their liking.
Whether it’s due to a lack of space or simply getting carried away in the moment, zooming out on a photo can be a challenge, especially if the shot has already been taken. With some simple editing techniques, Zoom Video Conference you can easily transform those “too close” shots into perfectly framed images that will make your heart skip a beat.
So get ready to learn some post-production tricks that will take your photography skills to new heights. Whether you’re an amateur photographer or a seasoned pro, these techniques will come in handy and add a new dimension to your photos. So grab your camera and let’s explore the world of zooming out on photos together
What does “Zooming Out” mean?
Zooming out refers to the process of adjusting the focal length of your camera lens in order to capture a wider angle of view. This means that instead of focusing on a specific subject or object in the photo, you are capturing more Chromebook Zoom Meetings of the surrounding environment as well.
Zooming out on photos can add an interesting element to your images by showing the bigger picture. It helps create a sense of scale and context for your main subject and also adds depth and dimensionality to your composition.
By including more elements in your frame, you can tell a richer story through your photos.
Moreover, zooming out allows you to capture beautiful landscapes, How to zoom out on a picture already taken architecture, or cityscapes without having to physically move closer. This is particularly useful when photographing large objects such as buildings or mountains where getting closer may not be possible.
Why Would You Want to Zoom Out on a Photo?
There are several reasons why you might want to zoom out on a photo that has already been taken. This feature can help you achieve different visual effects, enhance the composition of your photo, and add more context or storytelling elements to your image.
- To capture the entire scene: Sometimes when taking a photo, we may not be able to fit everything into the frame due to physical limitations or technical constraints. But by zooming out on the photo afterward, you can capture the entire scene and include all the important elements that may have been left out initially. This can be particularly useful for landscapes or group photos where you want to showcase a larger area or capture everyone in the shot.
- To create a sense of scale: Zooming out on a photo Zoom Meetings can also help establish a sense of scale or show the relative size of objects within the frame. For example, if you take a close-up shot of your friend standing How to Zoom Out on a Photo Already Taken next to an impressive What App Lets You Zoom Out Of Pictures? statue, it may not convey just how large the statue is. By zooming out and including more of its surroundings, you can provide viewers with a better understanding of its size in comparison to your friend.
- To tell a story: Sometimes adding some context Zoom Calls to an image can make it more meaningful and impactful. By zooming out on your photo, you can include additional details in the background that add depth and tell a story about what was happening at that moment. This technique works well for action shots, street photography, and candid moments where there are
The Importance of Original Photo Quality
The quality of a photo is one of the most important aspects to consider when taking or editing an image. It can make or break the overall aesthetic and impact of a photograph. In today’s digital age, where photos are easily shared and viewed on various platforms, ensuring original photo quality has become even more crucial.
Original photo quality refers to the resolution, clarity, and overall visual appeal of an image as it was captured by the camera. This means that no alterations or edits have been made to enhance or manipulate the photo in any way. Preserving this original quality is essential for several reasons.
Zoom Out Photo Editor
Firstly, high-quality photos have a much more significant impact on viewers compared to low-resolution ones. A clear and crisp image captures attention and draws the viewer into the scene, On the other hand, blurry or pixelated images can be distracting and take away from the intended message or story behind a photo.
When you zoom out on a low-quality image, it will appear How to Cast Zoom to TV even blurrier or pixelated than before because you are stretching out pixels over a larger area. On the other hand, if you have an original high-resolution image and zoom out without losing quality, you can print it in various sizes without compromising its clarity.
Step-by-Step Guide on How to Zoom Out on a Photo Already Taken
Have you ever taken a photo that turned out to be too zoomed in? Don’t worry, it happens to the best of us. Whether it was an accidental tap on the screen or just misjudging the framing, there are times when we end up with a photo that is too close-up. But fear not, because in this step-by-step guide we will show you how to zoom out on a photo already taken.
1. Open your chosen editing software
The first step is to open your chosen editing software Picture Editing on your computer or smartphone. This could be Adobe Photoshop, GIMP, or any other editing app available for your device.
2. Import the photo
Next, import the photo that you want to zoom out on into the editing software by clicking on “File” and then selecting “Open.” You can also drag and drop the photo directly into the editing window.
3. Select the crop tool
Once your image is opened in the editing software, select the crop tool from the toolbar. It usually looks like a rectangle with dotted lines around it.
4. Adjust crop settings
In most editing software, when you select the crop tool, a box will appear around your image with handles at each corner and side. Click and hold one of these handles and drag them outwards to expand your image.
Using Photo Editing Software
One of the most common and convenient ways to zoom out on a photo that has already been taken Gaming Laptops $3000 is by using photo editing software. With the advancements in technology, there are now various options available for editing photos, both paid and free.
Step 1: Choose the Right Photo Editing Software
The first step in this process is to choose the right photo editing software. This will depend on your personal preference, budget, and level of expertise. Some popular options include Adobe Photoshop, Lightroom, GIMP, Pixlr, Canva, and many others. It’s important to research and compare different software before making a decision.
Step 2: Import the Photo into the Software
Once you have chosen your preferred photo editing software, import the photo you want to zoom out on into the program. This can usually be done by clicking on “File” then “Open” or by dragging and dropping the image into the workspace.
Step 3: Select the Crop Tool
Next, select the crop tool from your toolbar. This tool is represented by a rectangle with overlapping lines at each corner. In most programs, it can also be accessed by pressing “C” on your keyboard.
Step 4: Adjust Your Crop Settings
With the crop tool selected, adjust your settings to zoom out on your photo. In some programs like Photoshop or Lightroom, you can simply click and drag outwards from one of the corners of your image while holding down shift
Recommended software and how to use it
When it comes to zooming out on a photo that has already been taken, there are several recommended software options available. These programs allow you to easily edit and manipulate your photos, including the ability to zoom in or out on specific areas. Below are some of the top recommended software for this task and a step-by-step guide on how to use them.
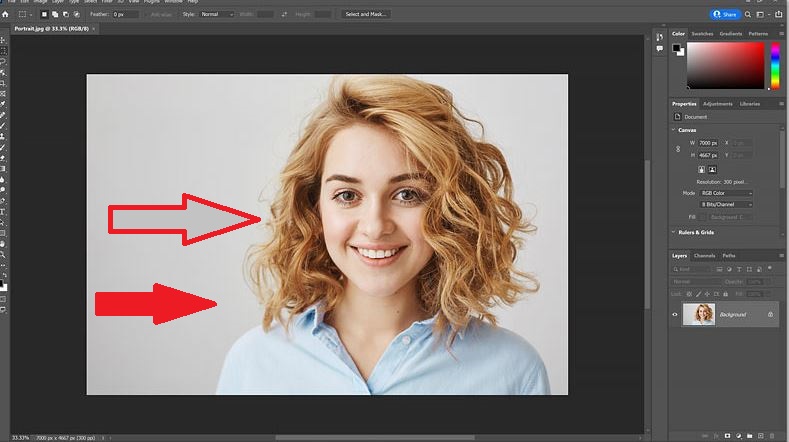
1. Adobe Photoshop
Adobe Photoshop is a widely used program for editing and enhancing photos. It offers various tools and features that make it perfect for zooming out on photos already taken. To use this software for zooming out on a photo, follow these steps:
- Open your photo in Photoshop by going to File > Open.
- Use the Zoom tool (shortcut: Z) from the toolbar or press Ctrl + Spacebar (Command + Spacebar for Mac) to activate the temporary Zoom In tool.
- Click and drag towards the right side of your image until you reach the desired level of zoom
- Next, click on Image from the menu bar at the top 16GB of your screen app to zoom out pictures and select Image Size.
- In the Image Size dialog box, uncheck “Resample Image” if necessary.
- Change either width or height value (depending on which way you want to zoom) under Pixel Dimensions section.
- Click OK once you’re satisfied with your changes.
Adjusting zoom level and saving the edited photo
Adjusting the zoom level of a photo is an important step in the photography process. It allows you to control the composition and focus of your image, making it more visually appealing and impactful. Whether you have taken a photo is there a way to zoom out a picture that is too close-up or too far away, adjusting the zoom level can help you achieve the desired result.
In this section, we will discuss how to adjust the zoom level of a photo and save your edited image.
Step 1: Open your photo editing software
To start, open your preferred photo editing software on your computer. Some popular options include Adobe Photoshop, Lightroom, or even free online editors like Pixlr or Canva.
Step 2: Import the photo
Once the software is open, import the photo you want to edit by clicking on “File” from the menu bar and then selecting “Open.” Choose the desired photo from its location on your computer and click “Open.”
Step 3: Locate zoom tool
Next, locate the zoom tool in your editing software. This can usually Robotics Programming be found in one of two places – either as an icon on one of the toolbar panels or under a dropdown menu labeled “View.”
Step 4: Adjusting zoom level
With the zoom tool selected, click on your photo to activate it. You will see a percentage value next to or near your cursor indicating how much you are currently zoomed in or out. To adjust this percentage, use either a slider or enter a specific value into a text box,
Option 2: Cropping the Photo
Another way to zoom out on a photo that has already been taken is by cropping the image. This method allows you to manually adjust the frame of your photo and remove any unwanted elements, ultimately creating a larger view of your subject.
Step 1: Choose an Editing Software
To crop your photo, you will need to use an editing software such as Adobe Photoshop, Lightroom, or even free online tools like Pixlr or Canva. Choose whichever software you are comfortable using and have access to.
Step 2: Open Your Photo
Once you have chosen your editing software, open the photo that you want to zoom out on. Make sure it is saved in its original resolution so that when you crop it, the quality does not decrease.
Step 3: Select the Crop Tool
In most editing softwares, there will be a specific tool for cropping images. Look for this tool in the toolbar or menu and select it. It usually looks like a rectangle with corners highlighted.
Step 4: Adjust Your Crop Box
With the crop tool selected, click and drag on your photo to create a box around the area you want to keep in your final image. You can also manually input dimensions for more precise adjustments.
Step 5: Refine Your Selection How to add a picture to zoom on Iphone
Once you have created your crop box, take some time to refine and adjust it until you are satisfied with what will remain in your final image.